
If you're an integration developer for a logistics, OMS, or WMS SaaS, the ability to programmatically create shipments is a core requirement. But building and maintaining dozens of unique integrations for each shopping cart is a direct path to technical debt and a stalled product roadmap. For any B2B SaaS looking to scale, a unified API isn't just a good idea—it's the only viable path forward.
Why Unified Shipment Creation Is a Game-Changer for Developers
For integration developers building shipping automation software, the central challenge is fragmentation. You're not just building one connection; you're tasked with developing, maintaining, and patching dozens of separate integrations for platforms like Shopify, Magento, WooCommerce, and BigCommerce. Each has its own authentication quirks, data structures, and error-handling logic, turning your backlog into a maintenance nightmare.
This fragmented reality directly impacts your development velocity. Instead of innovating on your core product, your engineering team sinks massive resources into just keeping the integrations alive. When a platform deprecates an endpoint, your entire workflow for that cart breaks, forcing you to drop everything for unplanned emergency work. For a deeper dive into the architecture of unified systems, this guide on API Integration: Key Insights and Examples is an excellent primer.

The API2Cart Use Case: A Single API for All Platforms
This is where a service like API2Cart fundamentally changes your development cycle. It abstracts away the maddening complexity of individual eCommerce platforms, presenting a single, consistent REST API to manage all shipping-related tasks.
Consider the immediate benefits for your development team:
- Accelerated Time-to-Market: Instead of dedicating months to build a single connector, you integrate once with API2Cart and gain immediate access to over 40 platforms. A project that would take a full quarter can now be completed in a single sprint.
- Reduced Engineering Overhead: All maintenance, updates, and monitoring for individual platform APIs shift from your team to API2Cart. No more parsing dozens of API changelogs or scrambling to patch breaking changes. Your developers are freed up to build features that deliver actual business value.
- Built-in Scalability: A unified API is architected for volume. As your customers' order volumes spike, the integration scales with them—no re-architecting your core application to handle the load.
By unifying how you create shipments, you transform a significant development bottleneck into a strategic advantage. Your software becomes more robust, reliable, and valuable to merchants, regardless of which eCommerce platform they use.
This approach simplifies the entire data flow, starting with order retrieval. Before you can create a shipment, you must pull order data—a task that varies wildly across carts. To see this in action, check out our guide on how to get order data from various shopping platforms via one API. It's a foundational step that becomes trivial with a unified integration.
Connecting to Stores with API2Cart Authentication
Before your application can create shipments, it must establish a secure, authenticated connection to a merchant's store. Getting this initial handshake right is fundamental to preventing a cascade of authorization errors. The advantage for a developer using API2Cart is that this entire process is standardized across every platform.
Your primary credential is the API Key, which identifies your application. You must include it in every request to API2Cart's endpoints. This key is available directly from your API2Cart account dashboard.
Adding a Merchant's Store via API
With your API Key, the next step is connecting a merchant's eCommerce store using the account.cart.add method. This single method call replaces the need to build separate OAuth flows for Shopify or parse complex credential systems for Magento.
This method requires you to pass the appropriate credentials for the target shopping cart. For example, a Shopify store requires its API key and password, while a WooCommerce store needs its URL, consumer key, and consumer secret. API2Cart handles the underlying protocol complexity, so your application only needs to interface with this one endpoint. To dive deeper into the protocols involved, you can learn more about API authentication methods in our detailed guide.
A successful account.cart.add call returns a unique store_id.
Pro Tip: The
store_idis critical. It must be persisted in your database and associated with the merchant's account in your system. This ID is used in all subsequent API calls—from fetching orders to creating shipments—to specify which store you are targeting.
Practical Authentication Examples
Let's examine the account.cart.add method in practice. You simply need to pass your API key along with the cart-specific parameters.
Here’s a cURL request for adding a Shopify store:
curl -X POST
  https://api.api2cart.com/v1.1/account.cart.add.json
  -H 'Content-Type: application/json'
  -d '{
        "api_key": "YOUR_API_KEY",
        "cart_id": "Shopify",
        "store_url": "your-store.myshopify.com",
        "api_key_shopify": "SHOPIFY_API_KEY",
        "api_password_shopify": "SHOPIFY_API_PASSWORD"
      }'
And a Python example using the requests library:
import requests
import json

api_url = "https://api.api2cart.com/v1.1/account.cart.add.json"
payload = {
    "api_key": "YOUR_API_KEY",
    "cart_id": "Shopify",
    "store_url": "your-store.myshopify.com",
    "api_key_shopify": "SHOPIFY_API_KEY",
    "api_password_shopify": "SHOPIFY_API_PASSWORD"
}

headers = {"Content-Type": "application/json"}
response = requests.post(api_url, data=json.dumps(payload), headers=headers)

if response.status_code == 200:
    result = response.json()
    store_id = result.get("result", {}).get("store_key")
    print(f"Successfully added store. Store ID: {store_id}")
else:
    print(f"Failed to add store: {response.text}")
Mastering this single, standardized authentication workflow provides a secure and scalable foundation for all subsequent API interactions, making it the first step to efficiently create shipments across dozens of platforms.
Mapping Order Data to a Shipment Request
Once a secure connection is established, the core logic begins: transforming raw order information into a structured payload to create shipments. For any integration developer, this data mapping process is a notorious source of complexity. Field names and data formats vary unpredictably between platforms like Shopify, Magento, and WooCommerce.
API2Cart resolves this by normalizing the data. You call the order.info method to retrieve all details for a specific order. This single API call returns a clean, consistent JSON object containing everything needed—shipping address, line items, quantities—regardless of the source eCommerce platform. This means you write your mapping logic once, and it works everywhere.
Before mapping, the initial connection must be flawless. This flow chart illustrates the simple, repeatable authentication process you'll use for every store.
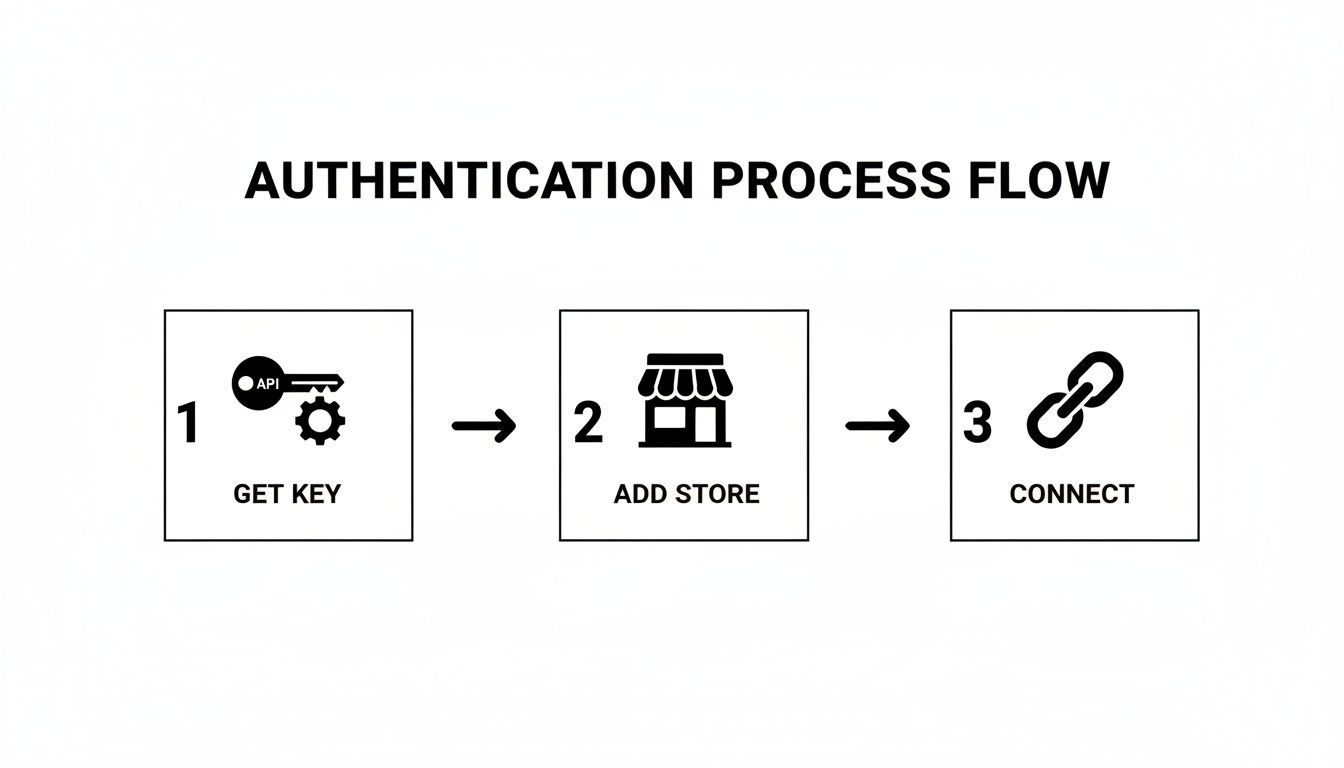
Think of this as the foundation. A clean, repeatable authentication process is what makes reliable data retrieval and mapping possible in the first place.
Translating Order Data for Shipment Creation
After fetching an order with order.info, the next step is to construct a request for the order.shipment.add method. This is a direct translation task: taking specific fields from the order response and populating a new JSON object for the shipment request.
For example, the shipping_address object from the order details maps directly to the shipment's destination address. Similarly, the order_products array becomes the items array in your shipment payload. This one-to-one mapping for key fields is a huge time-saver, eliminating the need to write custom parsers for each platform.
The core value here is abstraction. API2Cart handles the complexity of understanding each platform's unique data model. This frees you to focus on a single, predictable mapping workflow that works for creating shipments across more than 40 different carts.
Key Shipment Parameters and Examples
When constructing your request payload, several parameters are non-negotiable. The table below outlines the most critical fields for the order.shipment.add call, showing what they are and where to find the data in the order.info response. Correct mapping here prevents common errors from missing or malformed data.
Here's a quick look at the key parameters you'll need to map for a successful order.shipment.add API call.
Key Parameters for the order.shipment.add API Call
| Parameter | Data Type | Description | Example Value |
|---|---|---|---|
order_id |
String | The unique identifier for the order you are shipping. | "A123-456789" |
store_id |
String | The ID of the merchant's store, obtained during authentication. | "sc-12345" |
items |
Array | A list of products being shipped, including order_item_id and quantity. |
[{"order_item_id": "OI-987", "quantity": 1}] |
tracking_number |
String | The tracking number provided by the shipping carrier. | "1Z999AA10123456784" |
carrier_id |
String | The unique identifier for the shipping carrier (e.g., 'ups', 'fedex'). | "ups" |
This table covers the essentials, making sure your payload has everything needed for a standard shipment.
For international shipments, remember to include proper product classifications. A good resource on understanding HS Codes is essential here, as correct classification is what gets packages through customs without expensive delays.
Putting it all together, here’s what a complete JSON request body might look like. Notice the clear, structured data. This provides the platform with everything it needs to create the shipment and link it back to the original order.
{
  "order_id": "SH-1021",
  "store_id": "sc-98765",
  "tracking_number": "1Z999AA10123456784",
  "carrier_id": "ups",
  "notify_customer": true,
  "items": [
    {
      "order_item_id": "OI-554",
      "quantity": 2
    },
    {
      "order_item_id": "OI-556",
      "quantity": 1
    }
  ]
}
This structured, predictable format is the key to consistency. It ensures you provide all the necessary information in a way that works across every supported platform, turning a complex, multi-platform headache into a single, manageable API call.
Time to Programmatically Create a Shipment
With the order data mapped and the payload constructed, it's time for the primary action: making the API call that creates the shipment. This is the point where your software programmatically updates the merchant's store, signaling that an order has been fulfilled.
The developer advantage of using API2Cart is that the order.shipment.add method works identically across more than 40 different eCommerce platforms. There's no need to write platform-specific code for Shopify, WooCommerce, or Magento—it's one endpoint to manage them all.
This single API call handles all the underlying work: creating the shipment record, attaching tracking details, and optionally triggering a notification email to the customer. It's the final action that closes the fulfillment loop directly within the source eCommerce system.
Making the API Call with Code Examples
You will send the request payload you just built to the order.shipment.add endpoint. Every request requires your api_key, the specific store_id for the merchant, and the shipment payload itself (including order_id, tracking_number, and items).
Here are ready-to-use examples in cURL, Python, and PHP, demonstrating how the essential parameters are passed to create a valid shipment.
cURL Example
curl -X POST
  https://api.api2cart.com/v1.1/order.shipment.add.json
  -H 'Content-Type: application/json'
  -d '{
        "api_key": "YOUR_API_KEY",
        "store_id": "sc-98765",
        "order_id": "SH-1021",
        "tracking_number": "1Z999AA10123456784",
        "carrier_id": "ups",
        "notify_customer": true,
        "items": [
          {"order_item_id": "OI-554", "quantity": 1}
        ]
      }'
The cURL command is ideal for quick terminal-based testing to validate your payload structure and authentication before integrating into application code.
Python with requests
import requests
import json

api_url = "https://api.api2cart.com/v1.1/order.shipment.add.json"
payload = {
    "api_key": "YOUR_API_KEY",
    "store_id": "sc-98765",
    "order_id": "SH-1021",
    "tracking_number": "1Z999AA10123456784",
    "carrier_id": "ups",
    "notify_customer": True,
    "items": [{"order_item_id": "OI-554", "quantity": 1}]
}
headers = {"Content-Type": "application/json"}

response = requests.post(api_url, data=json.dumps(payload), headers=headers)
print(response.json())
This Python snippet is perfect for backend services, allowing you to integrate shipment creation directly using the popular requests library.
PHP Example
<?php
$apiKey = 'YOUR_API_KEY';
$url = 'https://api.api2cart.com/v1.1/order.shipment.add.json';

$data = [
    'store_id' => 'sc-98765',
    'order_id' => 'SH-1021',
    'tracking_number' => '1Z999AA10123456784',
    'carrier_id' => 'ups',
    'notify_customer' => true,
    'items' => [['order_item_id' => 'OI-554', 'quantity' => 1]]
];

$ch = curl_init($url . '?api_key=' . $apiKey);
curl_setopt($ch, CURLOPT_RETURNTRANSFER, true);
curl_setopt($ch, CURLOPT_POST, true);
curl_setopt($ch, CURLOPT_POSTFIELDS, json_encode($data));
curl_setopt($ch, CURLOPT_HTTPHEADER, ['Content-Type: application/json']);

$response = curl_exec($ch);
curl_close($ch);

var_dump(json_decode($response, true));
?>
What to Do with a Successful API Response
Making the request is only half the process; handling the response is equally critical. A successful request returns a 200 OK status code and a JSON object confirming the shipment's creation.
The most important piece of information in a successful response is the new
shipment_id. You must capture and store this ID in your system. It is the primary key that links your internal shipment record to the one created in the merchant’s eCommerce platform.
A successful response will be clean and simple, like this:
{
  "return_code": 0,
  "return_message": "",
  "result": {
    "shipment_id": "shp_1a2b3c4d5e"
  }
}
By parsing this response, you get immediate confirmation and can update your own database. This simple, reliable request-response cycle is the foundation of a robust fulfillment integration, ensuring data accuracy and providing clear status updates to your users.
In an ideal world, a single API call would behave identically across every platform. But as any integration developer knows, reality is far more complex. When you create shipments through a unified API like API2Cart, you are using a powerful abstraction layer, but the underlying platforms—with their unique business logic and quirks—still exist. Building a resilient integration means anticipating these differences and implementing robust error handling.
This starts with standardized error codes. Instead of learning 40+ different error response schemas, API2Cart normalizes common issues. For example, you might encounter an invalid order_id or a missing tracking_number. An error code like A005 consistently means "Required parameter is missing," whether the target platform is Shopify or BigCommerce.
Your integration is only as resilient as its error logging. Without detailed logs of failed requests, their payloads, and the exact error responses from the API, you are debugging blind. This is a non-negotiable component of any production-ready system.
Understanding Platform-Specific Behaviors
Beyond standard API errors, you must account for business logic unique to each platform, which a unified API cannot override. These nuances directly affect the end-user experience.
Here are a few real-world scenarios developers encounter:
- Customer Notifications: Setting
notify_customertotruemight trigger a standard email template in WooCommerce. However, the same call to Shopify could trigger a more customizable notification, potentially including SMS alerts, depending on the merchant's store settings. - Partial Shipments: Some platforms, like Magento (Adobe Commerce), offer sophisticated support for splitting a single order into multiple shipments. Others are more limited, making the
itemsarray in your payload especially critical to ensure accurate partial fulfillment. - Carrier Validation: A platform may have a predefined list of accepted shipping carriers. Sending a custom carrier string might succeed on one cart but fail on another that requires a strict match from its internal carrier list.
API2Cart effectively normalizes many of these differences, but your application code must be flexible enough to handle the unavoidable variations. By implementing robust error handling and being aware of these potential platform-specific behaviors, you can build a more intelligent and reliable shipment creation workflow that serves merchants effectively, regardless of their eCommerce cart.
Bring Your Workflows to Life with Webhooks and Best Practices
A modern integration doesn't just push data—it reacts to it. Constantly polling an API for shipment status updates is inefficient, slow, and resource-intensive. For a truly dynamic system, like a WMS or a logistics dashboard, you need information the moment it's available. This is where developers move beyond simple API calls to an event-driven architecture using webhooks.
Instead of your application asking "Is there an update?", webhooks allow the system to tell you. With API2Cart's webhooks, you can subscribe to specific events and receive instant notifications pushed directly to a specified endpoint. For instance, configuring a webhook for the order.shipment.add event means that the moment a shipment is created—by your app or any other tool—API2Cart will fire a payload to your listener. This eliminates polling and guarantees your system's data is always synchronized.

This real-time capability is what enables advanced, automated workflows. Imagine updating an inventory management system or triggering a customer support alert the exact moment a tracking number is added. That instantaneous reaction is the hallmark of a professional, enterprise-grade integration.
Strategies for a Production-Ready Integration
Building a feature that can reliably create shipments for thousands of merchants requires more than functional code; it demands a scalable and resilient architecture. As your user base grows, best practices must be baked into your integration to ensure stability and performance under load.
Here are essential strategies for building a production-ready feature:
- Respect API Rate Limits: Every platform enforces limits on API calls. Your integration must include logic to monitor usage, gracefully handle
429 Too Many Requestserrors, and implement exponential backoff strategies to avoid being blocked. - Embrace Batch Processing: High-volume merchants can generate thousands of orders requiring shipment creation. Firing individual API calls for each is inefficient and will quickly hit rate limits. Utilize batch processing methods where available to bundle requests, reducing API calls and improving throughput.
- Develop a Scalable Testing Plan: Your test suite must extend beyond unit tests. It should include integration tests against a staging environment and, critically, performance tests that simulate high-volume scenarios. This is how you identify and resolve bottlenecks before they impact your customers.
For a serious B2B SaaS product, these aren't just suggestions—they are requirements. They form the foundation for an efficient, sustainable, and powerful shipping feature that can scale seamlessly as your customers' businesses grow.
By adopting these advanced techniques, your ability to create shipments becomes more than just another feature. It transforms into a core, resilient strength of your application, fully capable of handling enterprise-level demands.
Ready to stop wrestling with individual eCommerce APIs and start building powerful, scalable shipping features? With API2Cart, you can connect to over 40 platforms through a single, unified API. Start your free 30-day trial and see how our integration solution can accelerate your product roadmap.